


How To Install and Configure Webmin on Ubuntu 20.04
What is Webmin?
Webmin is an open-source web control panel that allows you to administrate your Linux system through a web browser. With a few clicks, you can manage your users, configure the DNS, or tweak your web server. For those who are not big fans of the command line, this must-have tool will make your server administration smooth and easily manageable. In this article, we'll learn how to install and configure Webmin on Ubuntu 20.04 server.
Prerequisites
To install Webmin and its prerequisites, we’ll log into our server as a user with sudo privileges or as the root user.
Installation
We begin the installation process by updating our server packages to make sure everything is up to date.
isabel@host:~$ sudo apt-get update -y && sudo apt-get upgrade -yOnce system updates are done, we can proceed with the installation, where our first step is to add the Webmin Ubuntu repository.
Method 1
We’ll do this by manually adding the repository to the /etc/apt/sources.list file. Pick your favorite editor (such as nano, vim, or vi) and run a command to edit the file.
isabel@host:~$ sudo vim /etc/apt/sources.listNow add the following line to the bottom of the file and save your changes.
deb http://download.webmin.com/download/repository sarge contrib
Once the repository has been added, we’ll need to make our system trust it by adding the Webmin PGP key. In this first method, we’ll use the following commands.
isabel@host:~$ wget http://www.webmin.com/jcameron-key.ascisabel@host:~$ sudo apt-key add jcameron-key.ascAs we have successfully added a new repository, we’ll do another system package update, and this time it will include the Webmin repository.
isabel@host:~$ sudo apt updateAnd finally, we are ready to install Webmin with the following command.
isabel@host:~$ sudo apt install webmin -yThe second method is very similar to the first one. However, we’ll use a bit more versed commands this time to speed up the process.
Method 2
To download the Webmin PGP key and add it to our system, we can use this command.
isabel@host:~$ wget -qO- http://www.webmin.com/jcameron-key.asc | sudo apt-key addTo download and add the Webmin repository, we’ll use the following command.
isabel@host:~$ sudo add-apt-repository "deb http://download.webmin.com/download/repository sarge contrib"Once done, we can proceed with the update and installation.
isabel@host:~$ sudo apt update
isabel@host:~$ sudo apt install webmin -y
After the installation is complete, you’ll get the following details amongst the command line output.
Webmin install complete. You can now login to https://host:10000/
as root with your root password, or as any user who can use sudo
to run commands as root.
Configuring and Using Webmin
You should now be able to access your Webmin through your web browser if the mentioned port 10000 is opened in your firewall.
If you’re using ufw, you can easily open the port with the following command.
isabel@host:~$ sudo ufw allow 10000
Rule added
Rule added (v6)
Feel free to test your Webmin web panel via browser by using the following URL.
https://your_server_IP_address_or_hostname:10000
For example, if your server IP is 209.59.154.161, use https://209.59.154.161:10000 for access.
If you’re accessing Webmin from the device where it’s installed, feel free to use https://localhost:10000 instead.
Accessing the Webmin Panel
If the SSL certificate the Webmin panel is using is self-signed, your browser will most likely show you a warning message. Proceed through this warning until you reach the Webmin panel login screen. Replacing your self-signed SSL to one of the Certificate Authority signs will be discussed in the next section.
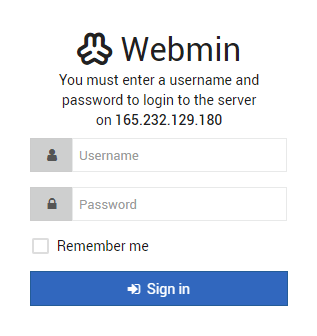
Input the credentials for your root user (or the ones for a user with sudo privileges) for access.
The Webmin interface has numerous details. System Information will pop up on the landing page and indicate which packages are available for update. Webmin will prompt you immediately to reboot should any of the updates require it.
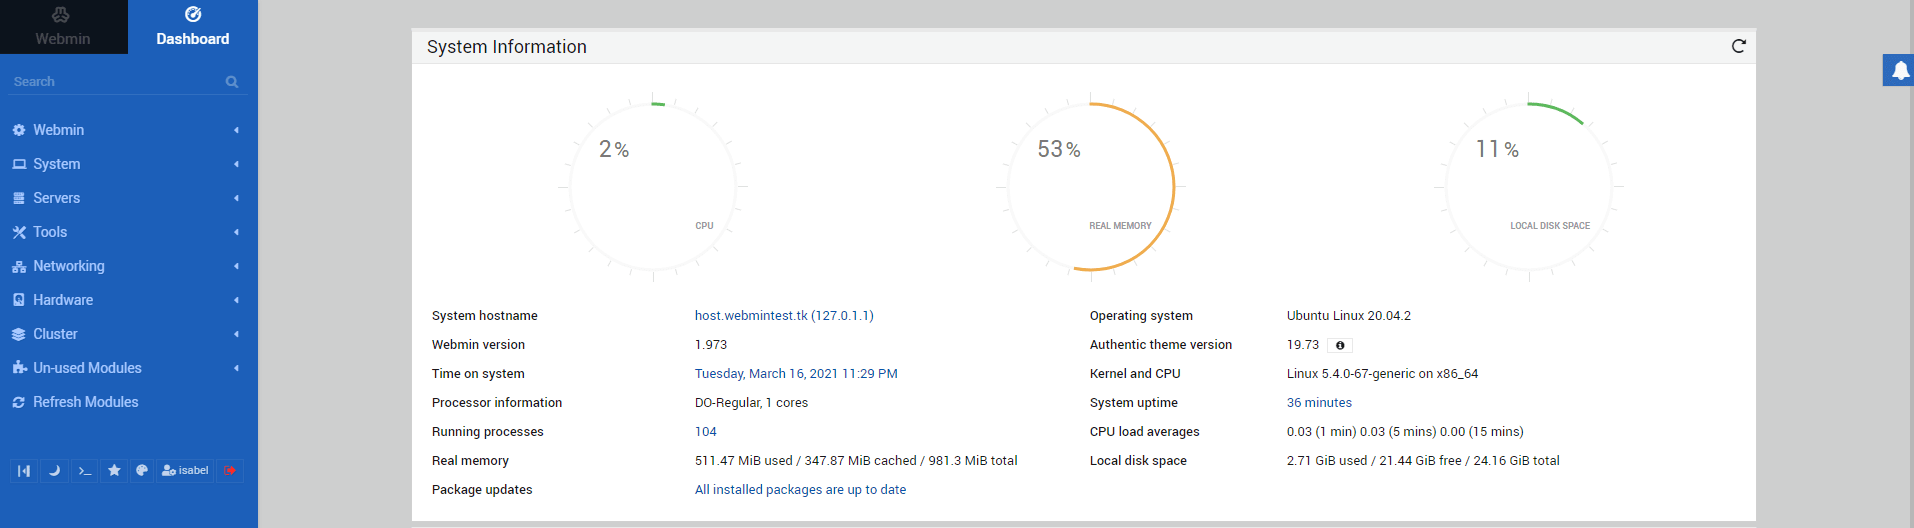
Using Webmin as a system configuration tool is relatively easy to grasp. There is a menu on the left side of the dashboard with multiple features. The best part is that you can add additional modules. Because Webmin operates similarly to a Berkeley Software Distribution (BSD) license, you can freely distribute it, and anyone can develop and distribute their own Webmin module for any purpose.
Replacing Your SSL Certificate
Now, let’s get back to securing our Webmin with an SSL certificate for that extra security layer.
To get started, there are a couple of additional requirements:
Setting Your Hostname
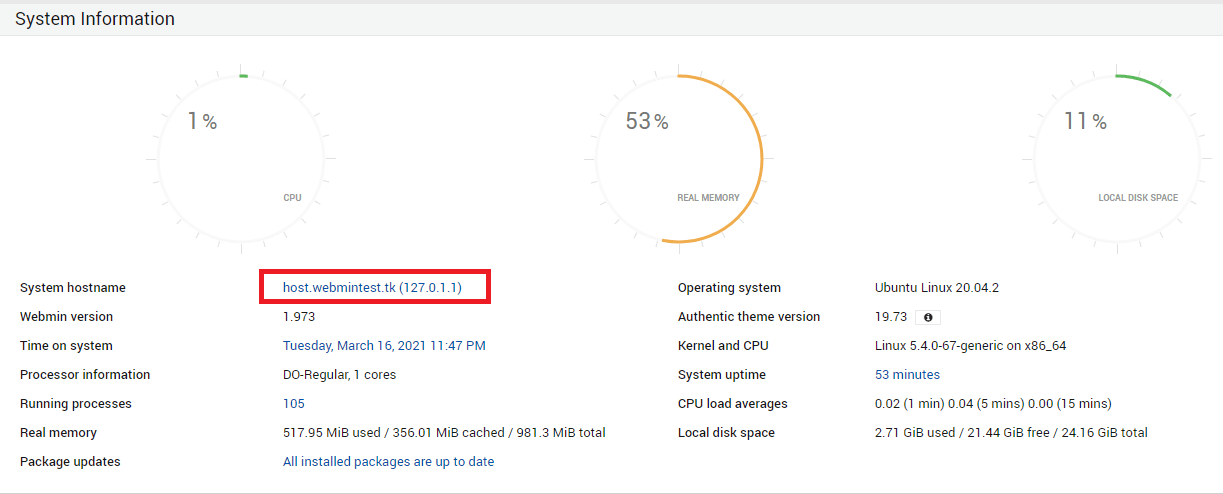
The first thing we’ll need to set is our server hostname. You can view and edit the hostname from the Webmin dashboard. Click on the information next to System hostname.
In this example:
- The domain is webmintest.tk.
- My server hostname is host.webmintest.tk.
- The hostname is pointed via the DNS A record to my server IP address.
To use this hostname and make our web server Apache serve Webmin over it, we’ll need to create a virtual host.
To create a directory for our hostname, we’ll use the following command.
isabel@host:/$ sudo mkdir /var/www/host.webmintest.tkUse the next commands to set the ownership to our user and make sure the permissions are correct.
isabel@host:/$ sudo chown -R isabel:isabel /var/www/host.webmintest.tk
isabel@host:/$ sudo chmod -R 755 /var/www/host.webmintest.tk
We can now move on to our virtual host. Use your favorite editor to create the configuration file.
isabel@host:/$ sudo vim /etc/apache2/sites-available/host.webmintest.tk.confIn the file itself, we’ll establish some basic directives.
<VirtualHost *:80>
    ServerAdmin webmaster@localhost
    ServerName host.webmintest.tk
    ServerAlias www.host.webmintest.tk
    DocumentRoot /var/www/host.webmintest.tk
    ErrorLog ${APACHE_LOG_DIR}/error.log
    CustomLog ${APACHE_LOG_DIR}/access.log combined
</VirtualHost>
Replace my domain with yours, and then save and close the file.
To enable our configuration file, we’ll use the following command.
isabel@host:/$ sudo a2ensite host.webmintest.tk.conf
Enabling site host.webmintest.tk.
To activate the new configuration, you need to run:
  systemctl reload apache2
And now, disable the default site that’s configured in 000-default.conf.
isabel@host:/$ sudo a2dissite 000-default.conf
Site 000-default disabled.
To activate the new configuration, you need to run:
  systemctl reload apache2
After we complete our edits, we can test our configuration to make sure there aren’t any Apache syntax errors.
isabel@host:/$ sudo apache2ctl configtest
Syntax OK
Once we confirm the syntax is okay, we can safely proceed with a restart.
isabel@host:/$ sudo systemctl restart apache2Request Your SSL Certificate
As we now have our hostname pointed to the server IP address via DNS and the proper virtual host, we can now request the SSL certificate.
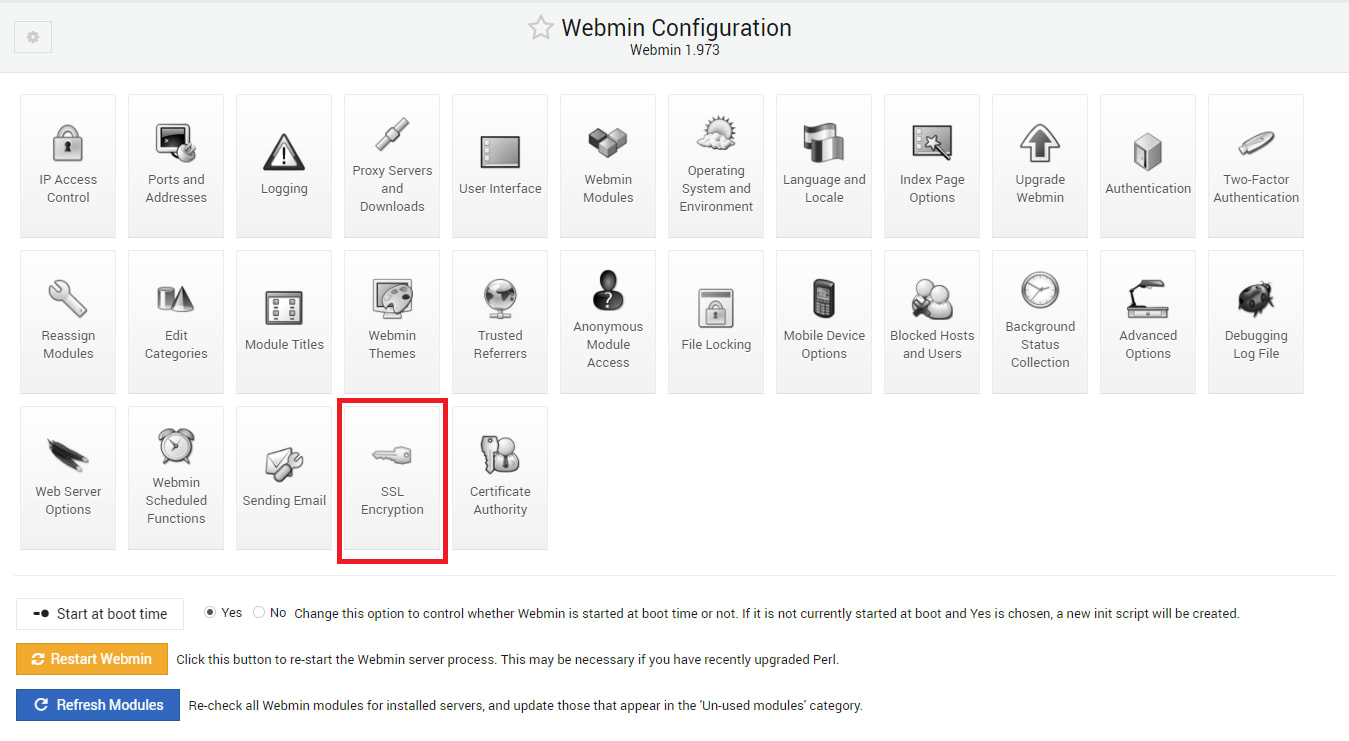
From the Webmin dashboard’s left-side menu, select Webmin Configuration and click on SSL Encryption.
Once opened, select Let's Encrypt from the menu. This is where we’ll order our SSL certificate.
In the hostname field, we’ll input our server hostname (host.webmintest.tk). To make sure our certificate will be automatically renewed, we’ll deselect the option Only renew manually on the Months between automatic renewal row. Type in the number 1 to the new input box that appears. The number 1 will make sure automatic renewals are enabled.
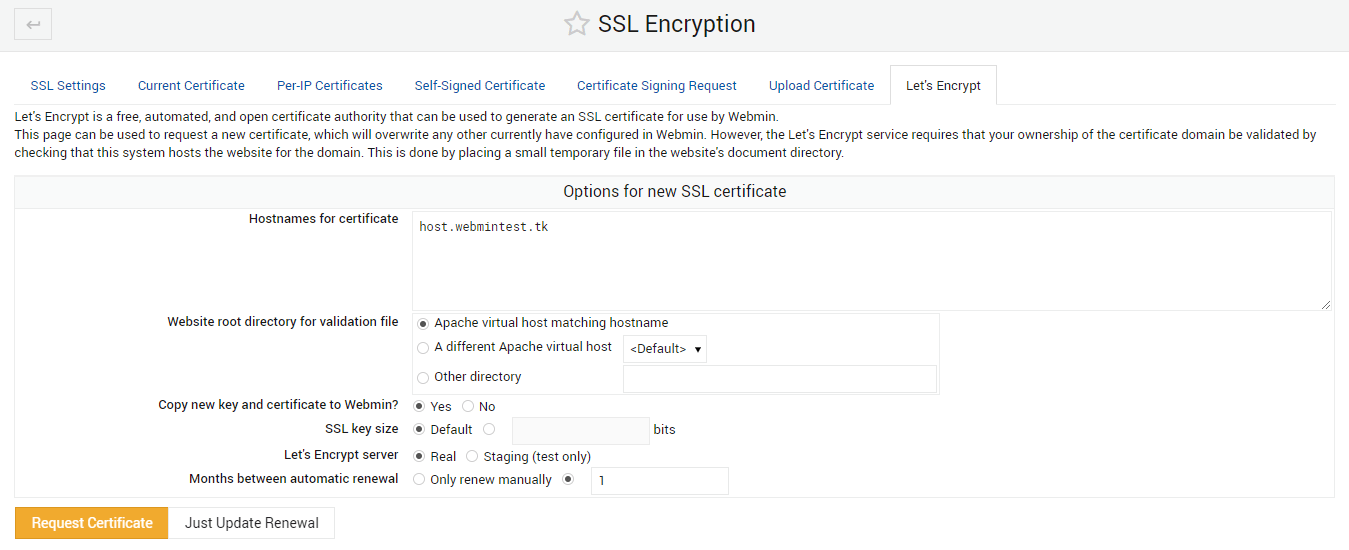
Once done, click Request Certificate and allow a few moments for the verification and installation to complete.
If successful, you’ll get the following message.

Conclusion
We just learned how to install Webmin and how to use it. Due to its high availability and highly adaptable interface, Webmin will always have its followers. We hope this tutorial was easy to follow and that you will explore many of the valuable features that Webmin has in its inventory. Webmin also works great on our Cloud VPS. Take a look at our Cloud VPS servers for 24/7 support and lightning speed servers!
Related Articles:


About the Author: Isabel Kettnich


Our Sales and Support teams are available 24 hours by phone or e-mail to assist.
Latest Articles
Useful Features in cPanel for Your Sites
Read ArticleUseful Features in cPanel for Your Sites
Read ArticleHow to Clone a Drupal Site to Another Domain
Read ArticleAccessing Man Pages on Ubuntu 16.04 LTS
Read ArticleWhat is VMware Fusion?
Read Article